
HubSpot's Sales Quotes feature allows you to seamlessly create and send quotes to potential customers, as well as collect a signature and payment all in the same place.
Let's walk through how to use the feature and then we will discuss whether or not your company will benefit from using it.
Click here to see HubSpot's heavily discounted Starter Bundle!
How To Use HubSpot's Sales Quotes - Walkthrough
Step 1. Add Products or Services to Your Portal
The first step is making sure that you have your company products or services added into the products section of your HubSpot portal.
In your HubSpot account, click the gear settings icon in the main navigation bar. Then in the left sidebar, navigate to Objects > Products & Quotes.
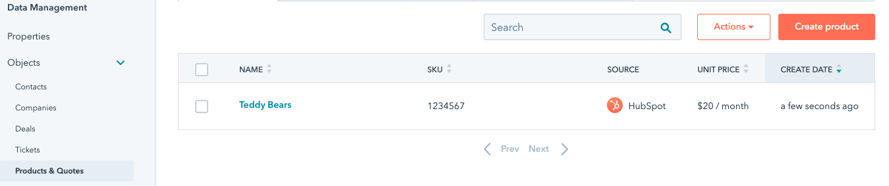
If you have not set up products before, the process is simple.
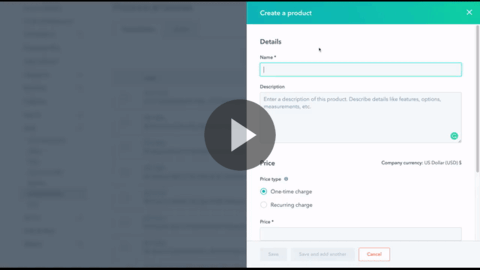
Start by clicking "Create a Product":
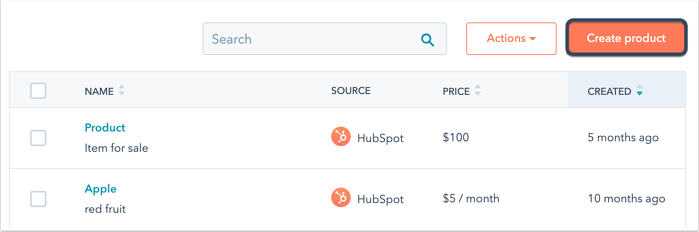
Once you have created all the products or services you offer, it is time to create your deal.
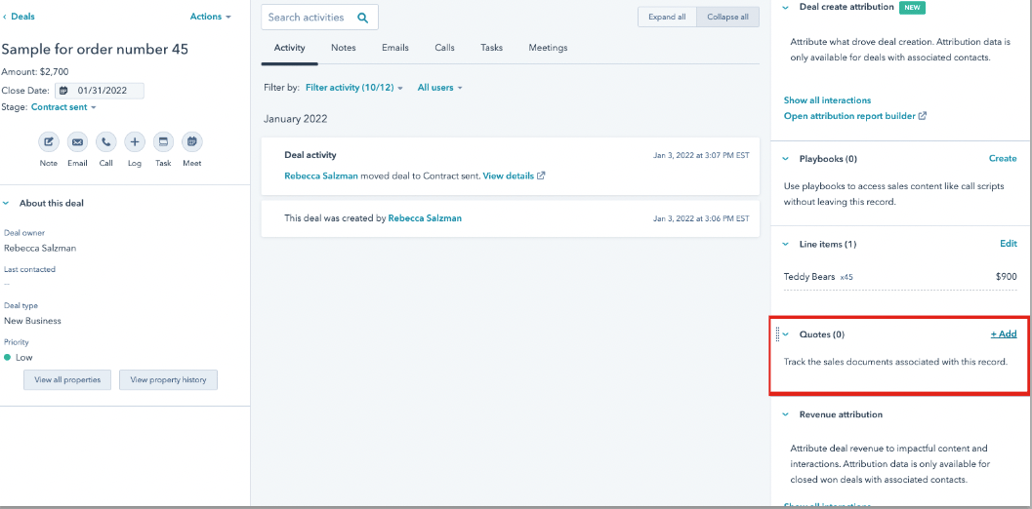
Step 2. Create or Choose a Deal
When created, a deal record should be associated with the contacts and companies that are involved with the deal. This helps HubSpot with associating the relevant activities to the deal record. Navigate to Sales in the main navigation bar > Deals. Then select create deal. Make sure to label it with a corresponding name to what you will call the finale quote and fill in the rest of the information.
Step 3. Create a Quote
Once you have created or selected a deal, it is time to create your quote.
In your deal, scroll down and find "Create quote" in the right hand column.
You will then see the Quotes builder pop up, but let's look at it step by step.
.jpg)
1. Template
The first step in creating a quote is selecting a template. Currently, there are three styles for you to choose from.
.jpg)
2. Name
Next, give your quote a name. The name can be the company who will receive the quote plus the reason for the quote.
Keep in mind, this is not an internal name. The name on the quote is the name that the client will see.
3. Expiration Date
You must then choose a date that this quote will expire.
.jpg)
There are preset date ranges, but you can also choose a custom date.
This step is a required field, so you have to choose a date.
4. Comments to Buyers/Snippet
Next, fill out your comments section. What does your customer need to know or be reminded of in this section?
If you are just sending this quote over as a preliminary example, the comments section is a great place to remind the customer that this is only an example and the price for products or services could fluctuate depending on their specific needs.
If you are sending this quote over in hopes of having a client sign, the comments section is a great place to recap your previous sales conversations, goals that will be accomplished through their purchase, etc.
5. Purchase Terms
The last step in creating the quote is to line out your purchase terms. This is a great place to reiterate when the quote will expire, what necessary actions are required from the customer to move forward, etc.
This is not a required field, but is definitely a great way to make sure the customer receiving the quote knows what to expect. So we encourage you to use this section if you can.
Once you have picked your template and entered all the necessary information, you are almost ready to send your quote!
The next few steps are very intuitive and simple to follow.
Click the "next" button to continue.
Step 4. Buyer Information
Once you have created your quote, the last few steps are to fill in the correct information.
First, you need to fill in the customer's information.
.jpg)
You can select more than one contact to send the quote to and add the company that they work for so that the quote will get logged in the contact records and the company records.
Step 5. Your Information
Add your contact information as well as your company's information. Make sure to have all of the proper information and correction addresses for billing purposes.
Step 6. Select Products
Here you will select which products or services you would like to add to the quote.
Click "add product" and the list you created earlier will pop up and allow you to select the products or services you need.
.jpg)
From this screen, if you need to edit the price of any item or the term length of a service, you can. You can also drag and drop to rearrange which products or services show up first in the list.
Once you have chosen all of your products or services, click "next".
Step 7. Signature and Payment
One of the last steps is to set up the signature requirement and connect your Stripe account, if you will be collecting payment directly through your quote.
.jpg)
If you are sending your quote over as an estimate or do not require a signature, you can choose to leave this feature out.
However, if you require a signature from your customer, you can choose to leave a space for a written signature or choose to accept an eSignature.
You can also connect your Stripe account so that you can receive payment from your customer as soon as they sign.
Step 8. Preview and Send
Lastly, you should review your quote to make sure you have filled out all necessary fields with the correct information.
If you realize that you need a bit more information before you feel confident sending this quote, you can click "save" and come back and edit later.
If everything looks good, click "Finish quote".
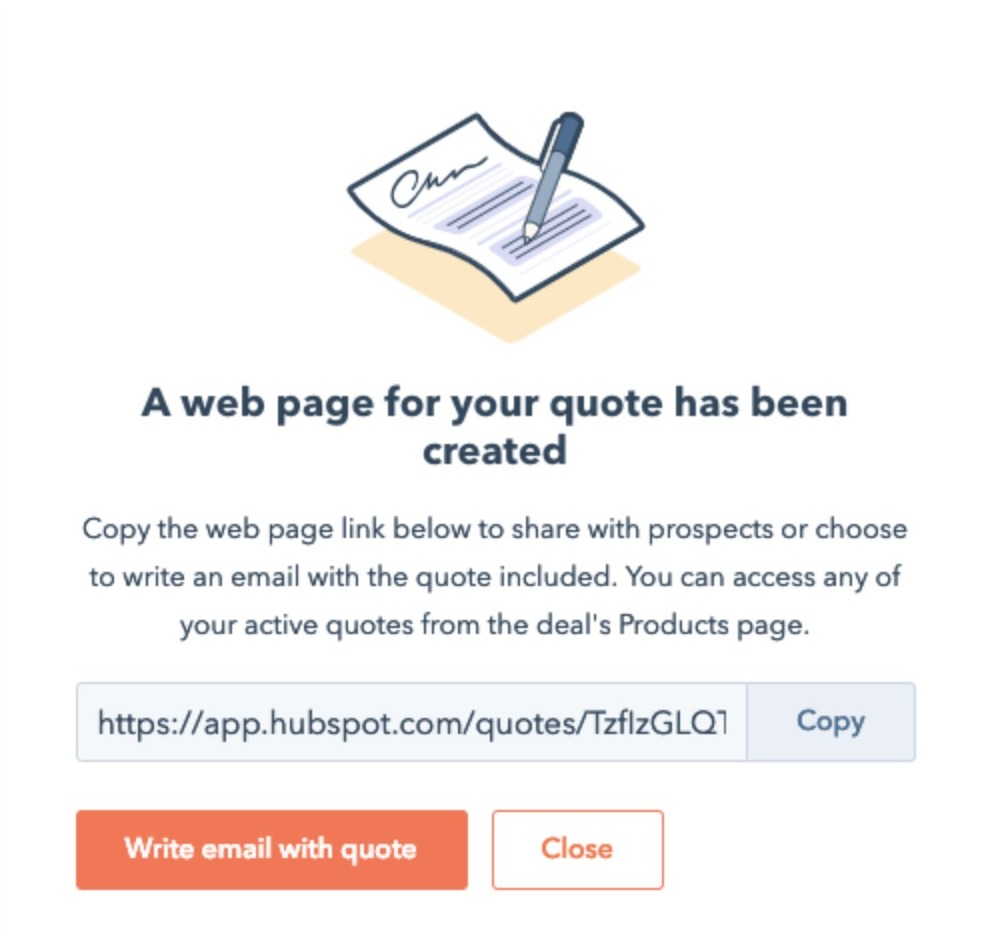
Once you click finish, you should see these options:
https://knowledge.hubspot.com/articles/kcs_article/deals/use-quotes
You can grab a link to the quote or click "Write email with quote" and an email will be auto-populated with a link to the quote as well as the contact's information.
Once you have sent your quote, your customer is able to view the quote in their browser or download as a pdf.
Will this Feature Work For your Company?
Overall, the process of creating and sending a quote is fairly simple and can be a huge asset to your sales team.
However, the process is not entirely customizable, just yet. While the template may populate with the primary color you have set up in your HubSpot settings, it lacks the ability to add your company's unique customization.
If you want a fancy and sophisticated quote, then the HubSpot Sales Quotes feature is not for you, yet.
A lot of people have put in requests to have a more options for customization or at least the option to hard code some of the features so that you are not having to create a new quote from scratch every time.
If you are in a service related business, the Sales Quotes feature may not enhance your sales process all that much.
For example, if your company offers marketing services, you probably have multiple phone calls with potential clients figuring out what services they are looking for and what your company can offer to help them reach their goals.
In that case, a full on proposal recapping your potential customers pain points, expectations, and your company's plan of action may be more practical than sending over a quote.
Our advice is to play around with the feature to see if it works for you or schedule a demo with HubSpot so they can walk you through it.
If you're looking for a more rapid application of this feature or hands on training, contact us and our founder and HubSpot guru Matt Smith will be in touch within 2 business days.